
Claude Code Skills: How to Create Your Own (with Examples)

If you keep pasting the same instructions into Claude Code ("write the commit message like this", "create components following this pattern"), it's time to turn them into a skill. In this post I will show you what Claude Code skills are, how to create your own and how to test it, with three examples you can copy. The short answer: a skill is a folder with a SKILL.md file inside .claude/skills/ (for a project) or ~/.claude/skills/ (for all your projects). The file has a short YAML header with a description and, below it, the instructions in Markdown. Claude loads the skill on its own when your request matches the description, or you run it yourself by typing /skill-name.

Note: Everything here was checked against the official docs on October 15, 2026, and the examples were tested with Claude Code 2.1.300 on Windows 11.
What are Claude Code skills?
A skill is a package of instructions (and, optionally, scripts and reference files) that teaches Claude how to do a specific task your way. Some examples:
- how your team writes commit messages;
- the steps to create a new component or API endpoint;
- your deploy checklist;
- the conventions of an internal API.
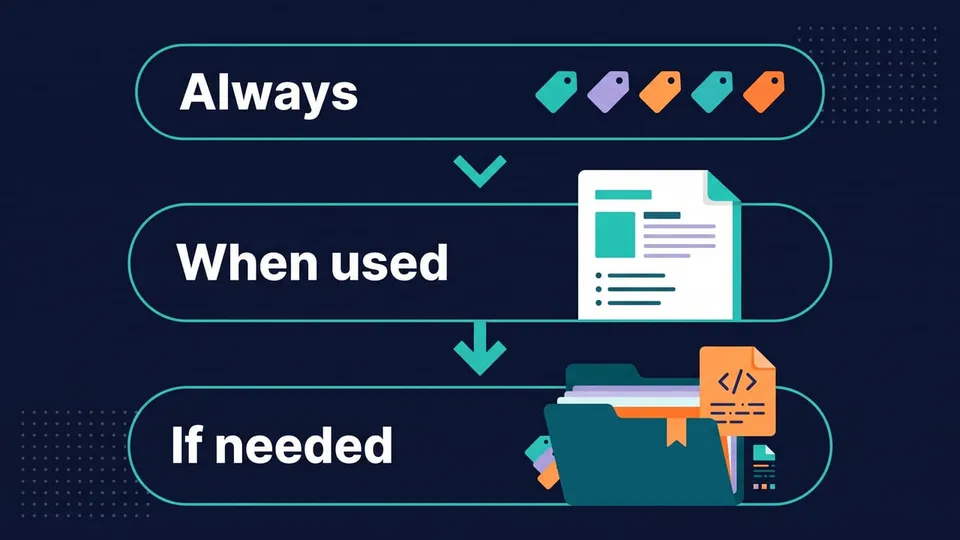
A skill loads in stages. At the start of each session, Claude Code only puts the name and description of each skill in the context. The body of SKILL.md is loaded only when the skill is used, and the extra files (references, scripts) only when the instructions point to them. The official docs call this progressive disclosure, and it means you can have many skills, even with long reference material, and pay almost nothing in context until you need them.
Skills follow the Agent Skills open standard, so the same SKILL.md format also works in claude.ai, in the Claude API and in other tools that adopted the standard. Claude Code adds some extras on top of it, like invocation control, running in a subagent and running shell commands before the skill is loaded.
Tip: Claude Code merged custom slash commands into skills. A file at .claude/commands/deploy.md and a skill at .claude/skills/deploy/SKILL.md both create /deploy, so your old commands keep working. Skills add the folder for supporting files and the option to let Claude load them on its own.
Where Claude Code skills live
Where you save the folder decides who can use the skill:
| Location | Path | Applies to |
|---|---|---|
| Personal | ~/.claude/skills/<name>/SKILL.md | All your projects |
| Project | .claude/skills/<name>/SKILL.md | This repository (commit it and the whole team gets it) |
| Nested | <subdir>/.claude/skills/<name>/SKILL.md | Loaded when Claude works with files in that folder (useful in monorepos) |
| Plugin | <plugin>/skills/<name>/SKILL.md | Where the plugin is enabled, as /plugin-name:skill-name |
| Enterprise | Managed settings | Everyone in the organization |
On Windows, ~ is your user folder, so personal skills go in C:\Users\<you>\.claude\skills. When two skills have the same name, enterprise wins over personal, and personal wins over project.
How to create a Claude Code skill (step by step)
Let's create the first one: a skill that writes a commit message in the Conventional Commits format from the staged changes.
1. Create the skill folder
In the root of your project:
mkdir -p .claude/skills/commit-message
The folder name becomes the command name: /commit-message.
2. Write the SKILL.md
Save this to .claude/skills/commit-message/SKILL.md:
---
name: commit-message
description: Writes a Conventional Commits message for the staged changes. Use when the user asks for a commit message, wants to commit, or asks what is staged.
---

## Staged changes

!`git diff --cached --stat`

!`git diff --cached`

## Instructions

Write one commit message for the changes above, in the Conventional Commits format:

- First line: `type(scope): summary`, at most 72 characters, imperative mood ("add", not "added").
- Use one of these types: feat, fix, docs, refactor, test, chore.
- Then a blank line and 1 to 3 bullet points that explain why, not how.

If nothing is staged, say so and suggest `git add`. Print only the message, don't run `git commit`.
What each part does:
name: the command name. It's optional (the folder name is the default), but if you set it, use lowercase letters, numbers and hyphens.description: the most important line. Claude compares your request with it to decide whether to load the skill, so say what it does and when to use it, with the words people actually type ("commit message", "staged").- The lines with
!`command`: this is dynamic context injection. Claude Code runs the command before sending the skill to Claude and replaces the line with the output. Claude gets the diff ready to use, without spending a step to rungit diff. - The body: plain Markdown with the instructions. Write it the way you'd explain the task to a teammate.
3. Test it
Stage something and start Claude Code in the project:
git add src/api.ts
claude
You can test it in two ways. Ask in your own words, and Claude should load the skill on its own:
can you write a commit message for what I staged?
Or call it by name:
/commit-message
In my test, I changed a function to retry failed requests, and the skill returned this:
fix(api): retry getPosts on non-OK responses

- Stop crashing when the API returns 500 by checking res.ok before parsing
- Retry up to three times so transient server errors don't reach callers
- Throw with the status code when retries run out, so the failure is clear
Tip: You don't need to restart Claude Code after editing a skill. Changes in ~/.claude/skills/ and .claude/skills/ are picked up during the session. Only when you create a skills folder that didn't exist before (the first .claude/skills/ of the project, for example) do you need to run /reload-skills.
SKILL.md frontmatter: the fields you will use
Every field is optional, but you'll almost always want a description. These are the most useful ones in Claude Code:
| Field | What it does |
|---|---|
name | Command name (defaults to the folder name) |
description | What the skill does and when to use it. Claude uses it to decide when to load the skill |
argument-hint | Hint shown in autocomplete, like <ComponentName> |
disable-model-invocation | true means only you can run it with /name |
user-invocable | false hides it from the / menu, so only Claude uses it |
allowed-tools | Tools Claude can use without asking for permission while the skill runs |
model / effort | Model and effort level for the turn that runs the skill |
context: fork | Runs the skill in a subagent, in a separate context |
paths | Glob patterns: Claude only loads the skill on its own when working with matching files |
Important! If you're going to upload the skill to claude.ai or use it through the Claude API, stick to the fields of the open standard: name, description, license, compatibility, metadata and allowed-tools. The others are Claude Code extras, and those environments reject the skill.
Example 2: a slash command with arguments
The second example is a skill you run yourself, passing an argument: /new-component Button creates a React component following the pattern of the components that already exist in the project.
Save it to .claude/skills/new-component/SKILL.md:
---
name: new-component
description: Creates a React component with a test file and an index export.
argument-hint: <ComponentName>
disable-model-invocation: true
allowed-tools: Read Glob Write
---

Create a React component named `$0`.

1. Read one existing component in `src/components/` and follow its style (props type, named export, CSS modules).
2. Create `src/components/$0/$0.tsx` with a `$0Props` type and a named export.
3. Create `src/components/$0/$0.test.tsx` with one Vitest + Testing Library test that renders the component.
4. Create `src/components/$0/index.ts` that re-exports the component and its props type.

If the name is missing or isn't PascalCase, ask for a valid name instead of guessing.
What's new here:
$0is the first argument you typed./new-component Buttonreplaces every$0withButton. Use$1,$2... for the next ones, or$ARGUMENTSfor everything at once. If the skill doesn't use any placeholder, Claude Code addsARGUMENTS: <what you typed>at the end of the content.disable-model-invocation: true: this skill creates files, so I don't want Claude running it because it thought it was a good idea. With this option, it only runs when you type/new-component, and its description isn't even loaded into the context.allowed-tools: while the skill runs, Claude can read files and create new ones without asking for permission each time. It doesn't block the other tools: they still follow your normal permission settings.
When I ran it, Claude read Card.tsx, the existing component, and created Button.tsx, Button.module.css, Button.test.tsx and index.ts in the same style, with no permission prompts.
Tip: You can also run a skill in non-interactive mode, claude -p "/new-component Button", which is useful in scripts. But in Git Bash, any argument that starts with / gets converted to a Windows path, and in my test the prompt arrived as C:/Program Files/Git/new-component Button. Run it with MSYS_NO_PATHCONV=1 claude -p "/new-component Button", or use PowerShell.
Who can run the skill?
The two invocation options combine like this:
| Frontmatter | You (/name) | Claude on its own | Description in context |
|---|---|---|---|
| (default) | Yes | Yes | Always |
disable-model-invocation: true | Yes | No | No |
user-invocable: false | No | Yes | Always |
Use disable-model-invocation: true for anything with side effects (deploy, commit, sending messages). Use user-invocable: false for background knowledge that isn't really a command, like the history of a legacy system.
Example 3: a skill with a script
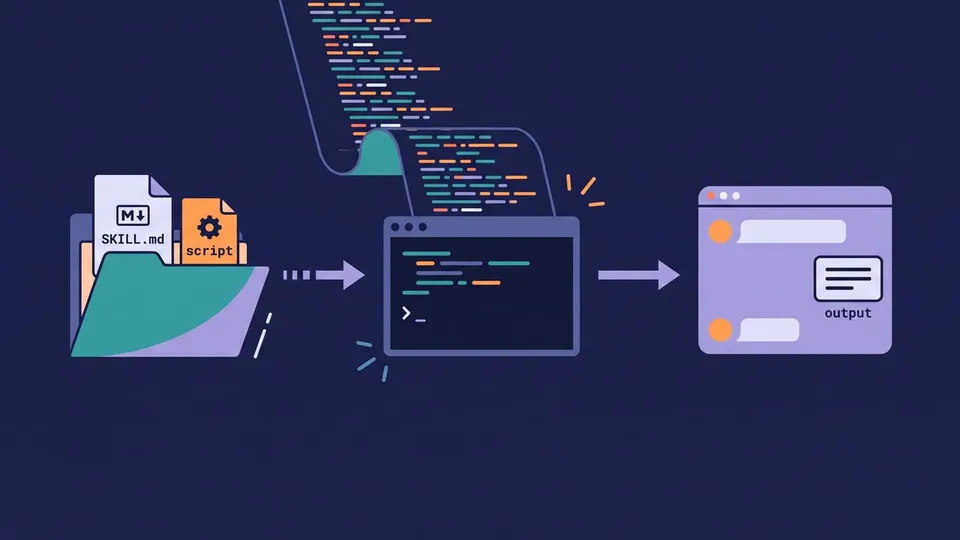
Instructions work for tasks that need judgment. For deterministic work, like scanning files for a pattern, a script does it the same way every time, and only its output goes into the context. Let's create a skill that lists the TODO and FIXME comments in the code and points out the most urgent ones.
The structure:
.claude/skills/todo-report/
├── SKILL.md
└── scripts/
    └── find-todos.mjs
The SKILL.md:
---
name: todo-report
description: Lists TODO and FIXME comments in the codebase and points out the most urgent ones. Use when the user asks about TODOs, FIXMEs, leftover work or tech debt.
allowed-tools: Bash(node ${CLAUDE_SKILL_DIR}/scripts/find-todos.mjs *)
---

Collect the comments with the bundled script (don't read every file yourself):

```bash
node ${CLAUDE_SKILL_DIR}/scripts/find-todos.mjs .
```

It prints one JSON object per line: `{"file", "line", "tag", "text"}`.

Then reply with:

1. The total count of TODOs and FIXMEs.
2. A short list grouped by file.
3. The 3 most urgent items: FIXMEs first, then anything about security, crashes or launch.
${CLAUDE_SKILL_DIR} is replaced with the skill's folder, so the command works no matter which folder you start Claude Code from. In allowed-tools, it lets Claude run only this script without asking.
And the script, scripts/find-todos.mjs (plain Node.js, no dependencies):
import { readdirSync, readFileSync } from 'node:fs'
import { join, relative, sep } from 'node:path'

const root = process.argv[2] ?? '.'
const skip = new Set(['node_modules', '.git', 'dist', 'build'])
const extensions = /\.(js|jsx|ts|tsx|mjs|cjs|css|html|py)$/
const comment = /(?:\/\/|\/\*|#|<!--)\s*(TODO|FIXME)\b(?:\([^)]*\))?:?\s*(.*)/

function walk(dir) {
  for (const entry of readdirSync(dir, { withFileTypes: true })) {
    if (skip.has(entry.name)) continue
    const path = join(dir, entry.name)
    if (entry.isDirectory()) walk(path)
    else if (extensions.test(entry.name)) scan(path)
  }
}

function scan(path) {
  const lines = readFileSync(path, 'utf8').split('\n')
  lines.forEach((text, index) => {
    const match = text.match(comment)
    if (!match) return
    console.log(
      JSON.stringify({
        file: relative(root, path).split(sep).join('/'),
        line: index + 1,
        tag: match[1],
        text: match[2].trim(),
      }),
    )
  })
}

walk(root)
It walks the project folders (skipping node_modules, .git and build folders) and prints each comment that starts with TODO or FIXME. Running it on a test project:
{"file":"src/auth.ts","line":1,"tag":"TODO","text":"validate the token signature before trusting it"}
{"file":"src/auth.ts","line":3,"tag":"TODO","text":"remove this before launch"}
With /todo-report, Claude ran the script without asking for permission, then put the security TODO at the top of the list.
Note: When I asked "list the TODOs left in this project" and Claude picked this skill on its own, Claude Code asked for permission to run the skill first (since it grants tools through allowed-tools). If you want it to run without that prompt, add Skill(todo-report) to your permission allow rules.
Tips for writing skills that work
- Say what the skill does and when to use it, with the words people actually type. Write the description in third person ("Writes a commit message..."), and put the main use case first: in the skill listing, the
description(plus the optionalwhen_to_use) is cut at 1,536 characters. - Keep it short. Claude already knows how to code, so write only what it doesn't know: your conventions, your steps, your gotchas. Keep
SKILL.mdunder 500 lines and move long reference material to separate files that theSKILL.mdlinks to (one level deep, no chains of references). - Put the important rules at the top. The skill content enters the conversation once and isn't read again, and if the conversation is compacted, Claude Code keeps only the first 5,000 tokens of each skill.
- Rules that must always hold go in a hook, which runs every time. Claude can skip an instruction in a skill, so "never edit
.env" or "always run the linter" works better as a hook. - For fragile steps with an exact sequence (a migration, a validation), give Claude a script to run instead of describing the steps.
- Use forward slashes in paths (
scripts/helper.py), even on Windows. The skill may run on macOS or Linux machines too. - Review skills you didn't write.
allowed-toolsfrom a project skill applies even in a-prun in a folder you have never trusted, so before running Claude Code in a repository you cloned, look at its.claude/skills/.
Skills vs slash commands, CLAUDE.md, MCP, subagents and hooks
Claude Code has several ways to extend it, and they overlap a bit. This is how they compare:
| Feature | When it loads | Use it for |
|---|---|---|
CLAUDE.md | Every session, in full | Rules that always apply: build commands, code style, "never do X" |
| Skill | Description always, content when used | Repeatable tasks, workflows you call with /name, reference material |
Slash command (.claude/commands/) | When you type it | The older format. It still works, but a skill does the same and more |
| MCP server | Tool names at start, schemas when used | Connecting to external systems: database, GitHub, Slack, browser |
| Subagent | When spawned, in a separate context | Tasks that read a lot of files and only need to return a summary |
| Hook | On an event (before a tool, after an edit...) | Things that must happen every time: lint, format, block a command |
With Claude skills vs MCP, the difference is what each one adds. MCP gives Claude new tools (access to a system), and a skill gives Claude knowledge and a procedure (how to do something). You can use both: the MCP server connects to your database, and a skill documents the schema and the queries your team uses.
Skills and subagents also combine: with context: fork in the frontmatter, the skill runs inside a subagent and only the result comes back to your conversation. This is good for research or review tasks that would fill your context with files.
The official docs have a good rule of thumb: when you type the same prompt to start a task, or paste the same procedure into the chat for the third time, make it a skill. If Claude gets a project convention wrong twice, put it in CLAUDE.md.
Claude skill creator and ready-made skills
You don't need to write every skill by hand. Some options:
- Ask Claude. Claude knows the skill format. After working through a task with it, ask: "create a skill that captures what we just did". Then review the result and cut what's obvious.
- skill-creator plugin. Anthropic's official plugin helps you create skills and tests them: it runs test cases with and without the skill and compares the results. Install it from inside Claude Code:
/plugin install skill-creator@claude-plugins-official
- Anthropic's skills repo. The anthropics/skills repository has example skills (including the ones Claude uses to create Word, PDF, PowerPoint and Excel files). To install them in Claude Code:
/plugin marketplace add anthropics/skills
/plugin install example-skills@anthropic-agent-skills
Important! Skills can run commands on your machine, so only install skills from sources you trust, and read the SKILL.md and scripts before you enable them.
Once you have a few skills, run /skill-doctor to see how much context each one costs and how often you use it, and /skills to see the list and turn skills on or off.
Claude Code skill not working? Common fixes
If Claude doesn't use your skill when you expect it to:
- Ask
What skills are available?to check that it was loaded. - Check the description: does it have the words you use when you ask for the task?
- Call it directly with
/skill-name. If that works but automatic loading doesn't, the problem is the description. - Check the YAML. If the frontmatter is malformed,
/skill-namestill works, but Claude can't match it against the description. Validate the folder with:
claude plugin validate .claude/skills
If it's the other way around and the skill runs when you don't want it to, make the description more specific or add disable-model-invocation: true.
FAQ
Where are Claude Code skills stored?
Personal skills are in ~/.claude/skills/<name>/SKILL.md (on Windows, C:\Users\<you>\.claude\skills) and work in all your projects. Project skills are in .claude/skills/<name>/SKILL.md inside the repository, so you can commit them and share them with your team.
Are skills the same as slash commands?
Almost. Custom slash commands were merged into skills: every user-invocable skill becomes a /name command, and the old .claude/commands/*.md files still work. The difference is that a skill can have supporting files and can be loaded by Claude on its own when the description matches.
Do skills use up my context?
Very little until they're used. Only the name and description of each skill are loaded at the start of a session, and the full content comes in when the skill runs. Skills with disable-model-invocation: true don't use any context until you call them.
Can I use the same skill in claude.ai and in the Claude API?
Yes, as long as you use only the standard fields (name, description, license, compatibility, metadata, allowed-tools). In claude.ai, you zip the skill folder, upload it and enable it in the settings. According to Anthropic's help center, skills are available on the Free, Pro, Max, Team and Enterprise plans and need code execution enabled.
Conclusion
A skill doesn't take much: a SKILL.md in a folder, with a description that says when to use it and instructions written the way you'd explain the task to a teammate. Start with a task you repeat every week, test it by asking in your own words and with /name, and adjust the description until Claude picks it up at the right time.
For rules that must run every time, without depending on the model, see Claude Code Hooks: A Practical Guide with Examples. If you're still deciding which AI coding tool to use, I compared the options in Cursor vs Claude Code and Codex vs Claude Code.
Links
- Extend Claude with skills (Claude Code docs)
- Extend Claude Code: CLAUDE.md, skills, subagents, hooks and MCP
- Agent Skills specification
- Skill authoring best practices
- anthropics/skills on GitHub
- How to create custom skills (Claude Help Center)
Tags: ai|claude-code|productivity